Decorative Artefacts

collage of four images showing different gilding phases on wooden case frames

‘Gilding Phase’

Click on any of the above phases to discover what goes into the making of my artefacts.

‘Good is not good where better is expected’

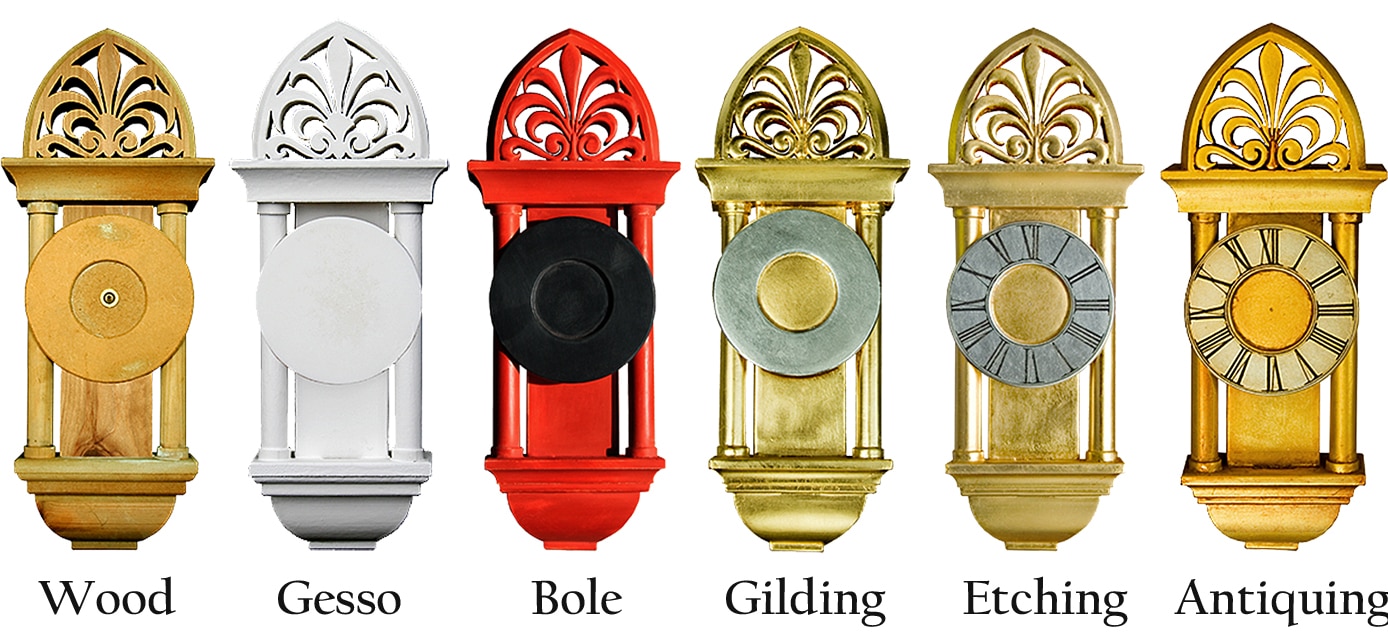
With the substrate now complete the artefact is now ready for gilding. In essence the process of gilding involves the application of a thin, smooth coat of glue called ‘gold size’ to which the metal leaf is applied.

There are two types of gilding, which are defined by the type of size used to affix the leaf. These are water or oil-based size and hence the term water or oil gilding. I use both these techniques depending on the finish required.

The size is applied to an artefact using a brush. Once the size has been applied you have to wait for the size to cure (dry) until it feels tacky -when you touch it with the back of your hand.

The gilding window, within which you can apply the leaf, varies according to the type of size and room temperature. With water gilding this window may only be a matter of seconds where as oil size it can be up to 3 hours.

gilded wooden case frame with intricate details and glass panel

Nowadays, there is a multitude of alternative ways of giving an appearance of a gilded finish but non-come near to appeal & beauty of the real thing. They also don’t have the longevity of gilded finishes & don’t age as beautifully as leaf finishes.

As a decorative artist the other benefit is that, with gilding, you can play with all the properties of the metal leaf. These include tarnishing it to create a whole new palette of complex colours or utilise its reflective qualities to create mirroring effects [verre eglomise] or as a surface to paint on to create stunningly vibrant colours.